Deciding the lights for our new house
01 Feb 2026 | #housing | #japanWe recently bought land and built our home in Tokyo. I wrote about the general design process, and in this post I will write about how we decided our lights. We have moved in 2 months ago, so I will also reflect on how well our ideas are working out so far.
Lights are usually the last thing that gets discussed during the design process of a house (it starts with the layout and equipments, and only then the lights and sockets). Many people are tired by then and just accept whatever the architect proposes. We cared about every detail of the house, so we spent time deciding this, and looking back, it was worth it.
Looking for advice
We didn’t know anything about lights, so we looked for advice. Panasonic has a free light advice service: upload the layouts, add any comments/wishes, they provide a lighting plan (of course using only Panasonic lights). We got this, and overall it was not bad, but they added 30-40% more lights than what we ended up using. I think it’s still a good starting point (and can bring up new ideas), but one should remember that they are in the business of selling lights so they might recommend more than necessary.
We also had two 1 hour consulting session with a a freelancer lighting designer: we shared our almost finalized layout and lighting plan, and went through each room with him on an online call. It was super helpful, he had great advice, and since he was paid by us directly, he could recommend lights from multiple companies (and also tell us that we had too many lights). I can highly recommend him (but please note that he doesn’t speak English).
Keeping our options open
One overarching principal for choosing lights was to allow us to change them later. This was partially due to the inevitability of changing preferences (e.g. kids growing up and wanting a different light) and also to minimize the decisions we had to make immediately (we only had to decide where the light will be, we can change the exact design later).
カチットF
For all bedrooms, my office, and the living room we chose to get a カチットF type adapters and a simple ceiling light. These are the ones that are very common in rental apartments and it takes only a few minutes to change them:
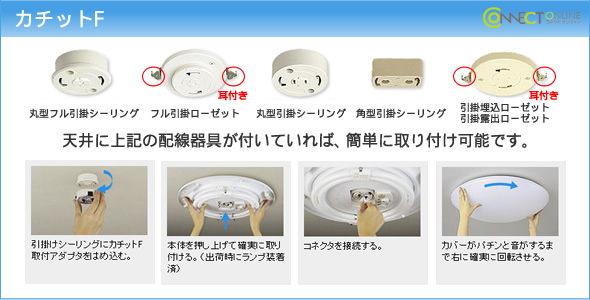
The simple ceiling light still came with a remote that allows to change the brightness and color temperature. We had similar lights in our previous apartment, so we knew what we were getting. Also even the IKEA lights are compatible with this adapter, so if we ever want to change them, we will have multiple options.
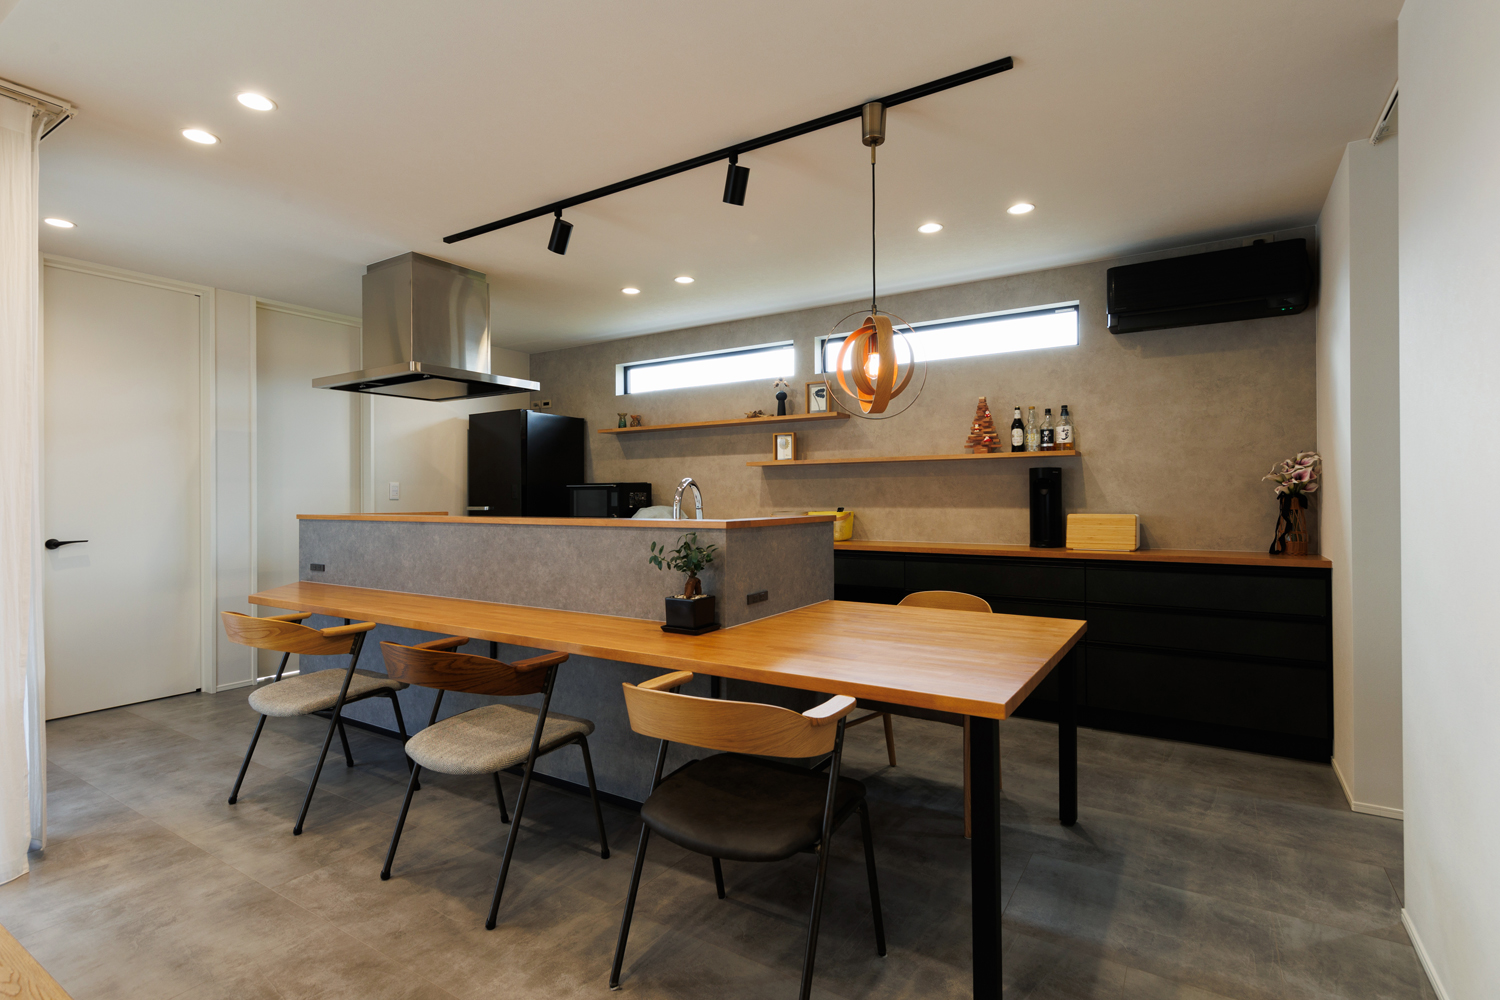
Track lighting
The other changeable light we got were track lighting or lighting rails (ダクトレール) for the kitchen counter and the dining table. This has the same benefit as カチットF but in addition it lets you move lights and add multiple lights. Both are nice if we change the size of the dining table.
Replaceable “bulb” in the downlights
For places like the genkan, corridor, washroom, and kitchen, we wanted to get downlights. However the default one recommended by Ichijo had a non-replaceable bulb. It is supposed to run for over 10 years, and then you need to ask an electrician to rip out the entire light and install a new one (this involves rewiring it, so only people with the electrician certification are allowed to do it). This is supposed to keep the cost low, but I really hated it, so I asked for one with replaceable bulbs.
My first idea was to get a downlight with the normal E26 light bulb, but the architect said that those are very deep (as the bulbs are long) and they can’t be used on the top floor (they can’t fit due to the insulation). So he suggested one with a GX53 bulb, as these bulbs are flat, but still replaceable. The format is standardized so multiple companies are making them (at some point even IKEA was making them, although they stopped).
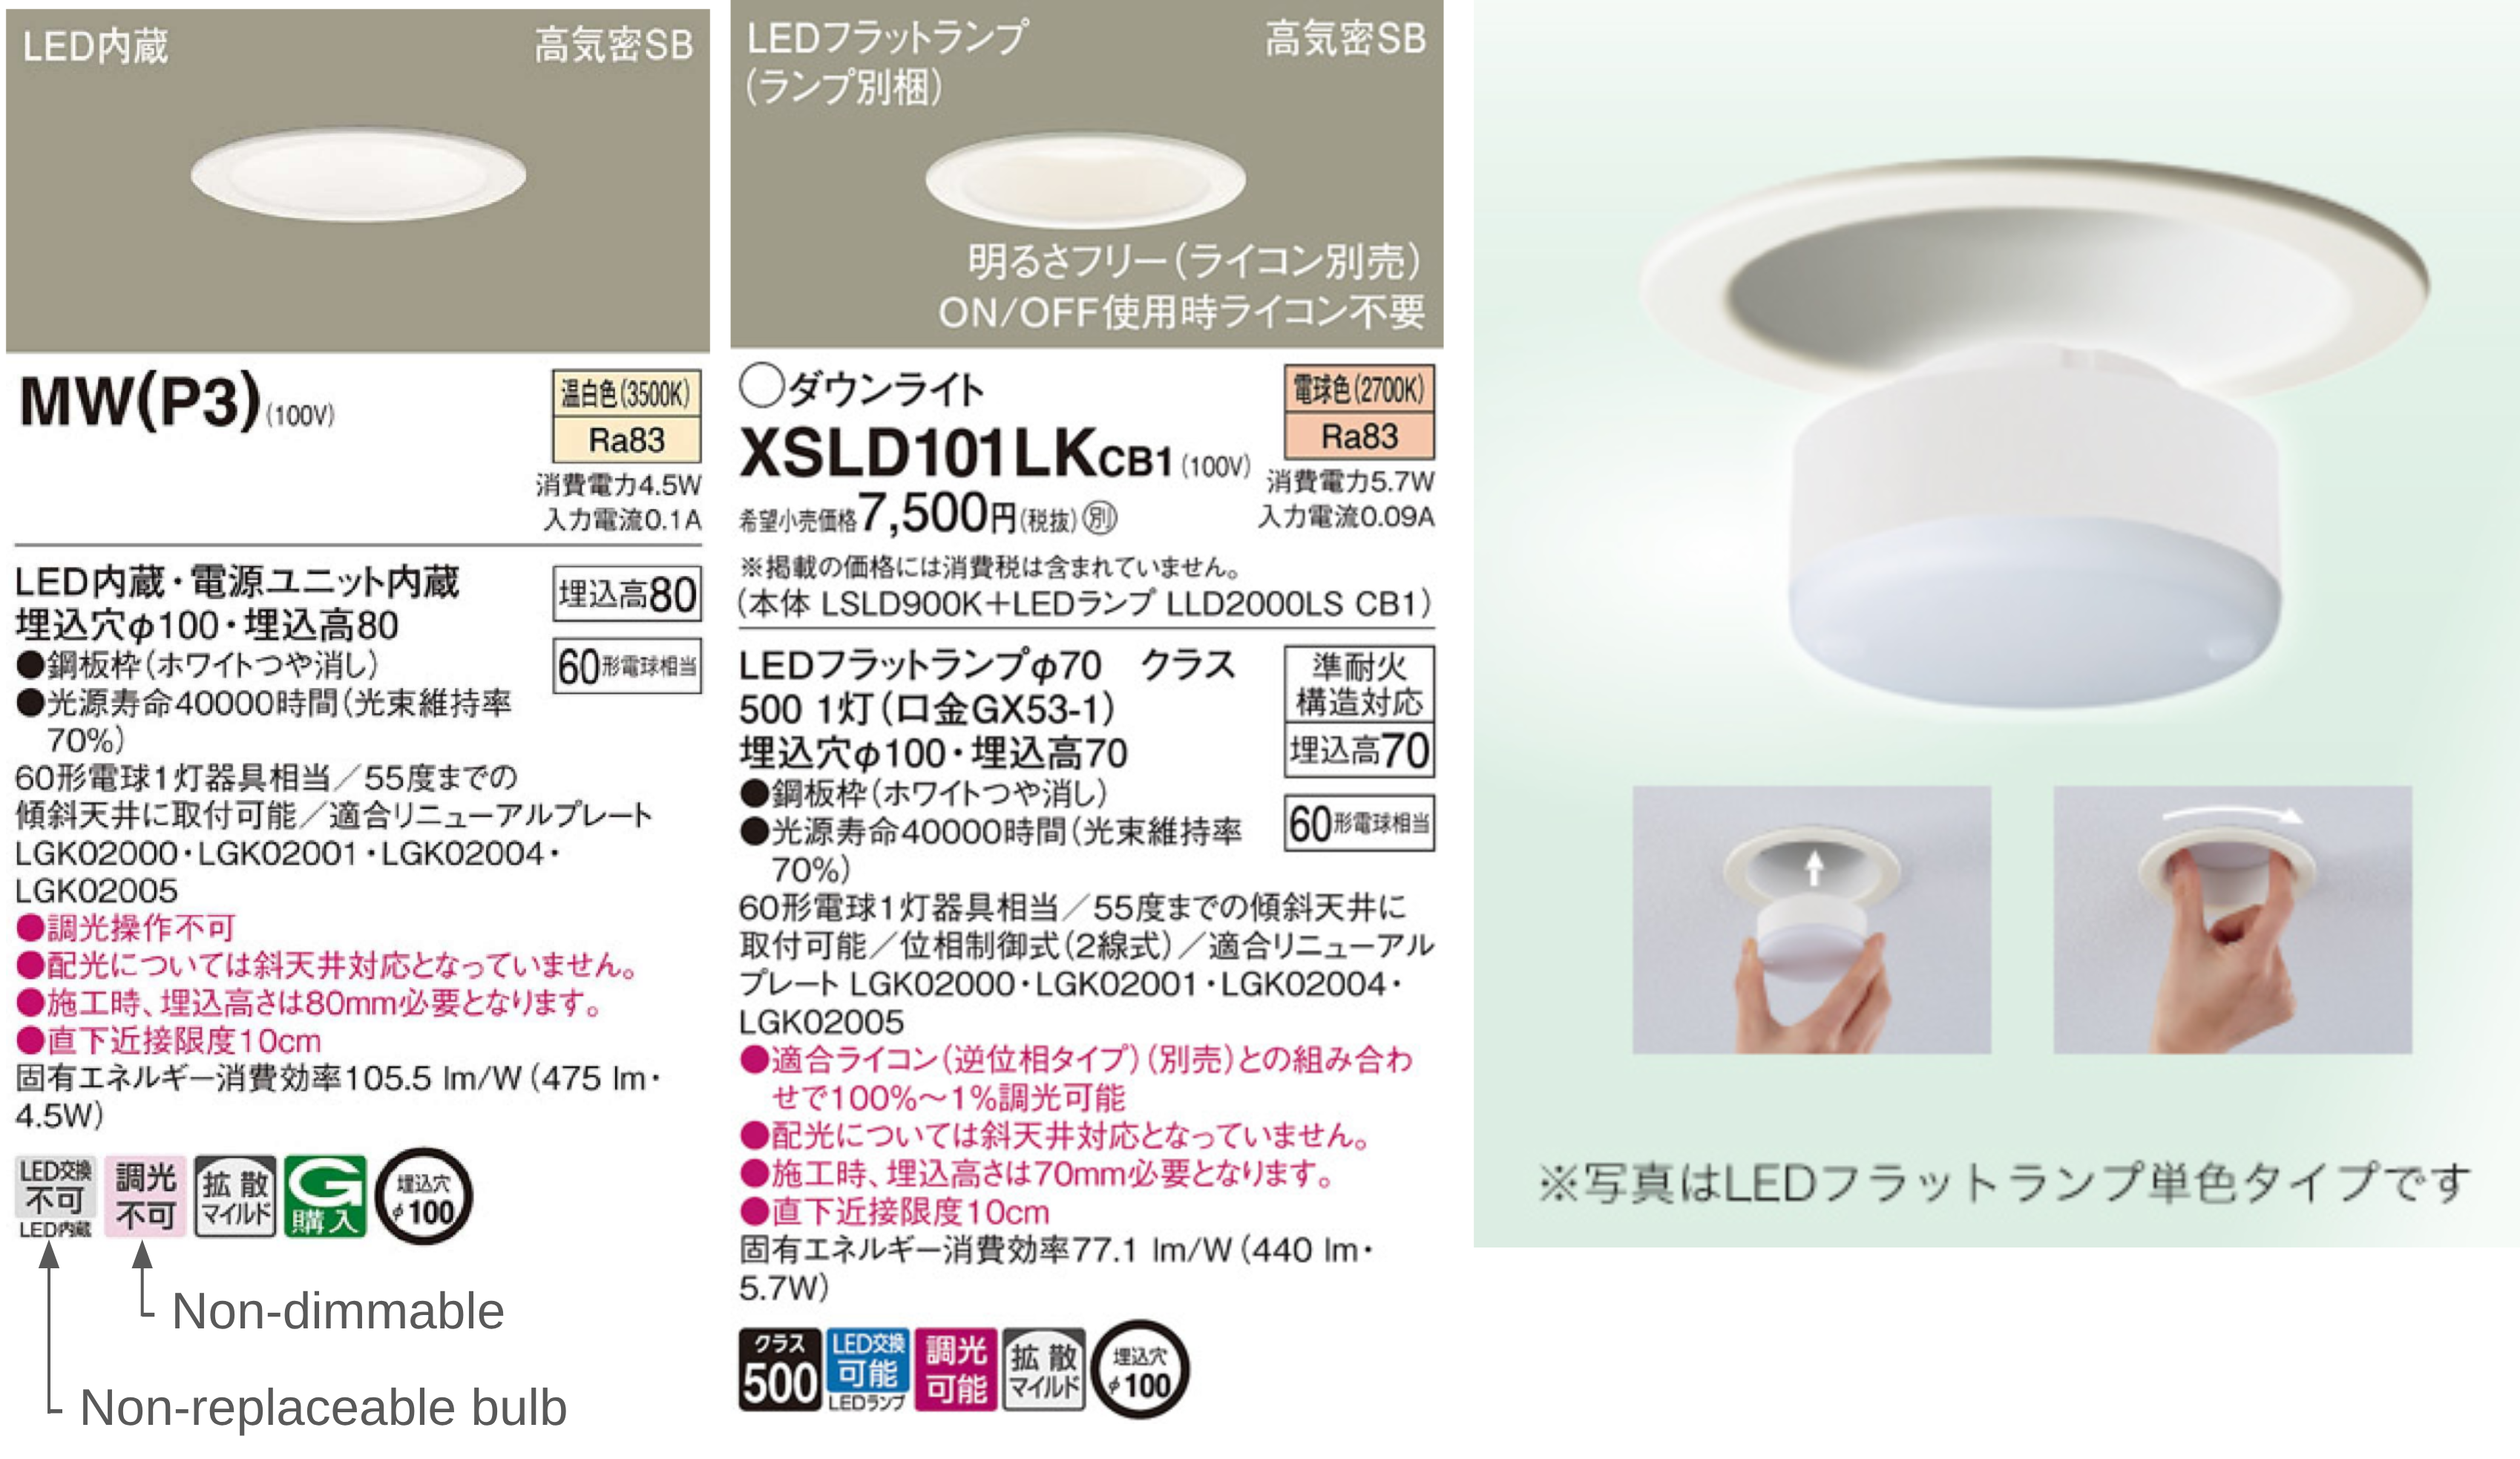
Being replaceable enables a few things:
- if they are too bright, we can switch them to a lower power one (the opposite is usually not allowed due to power ratings)
- if we want to change it to cold or warm white, it is possible
- we can install a smart bulb if there is a need (the switches are smart already, so sofar I don’t have a use-case for this, but nice to keep the option open)
Warm white everywhere
For most lights, we could choose between cold, natural, or warm white. We were thinking between natural or warm, and I got the advice from someone that unless you are building an office or hospital, warm white everywhere is the best. The only exception is the washroom mirror for putting on make-up. So this is what we did: the downlights and bracket-lights are all 2700K, and the ceiling lights (カチットF) are set to warm using the remote.
Actually Ichijo’s washroom sink cabinet includes a normal-white light, so even in the washroom the downlight on the ceiling is 2700K.
After a few months in the house, this was a great idea. It gives the home a warm feel and helps prepare to sleep.
Low light for night action
We have two small kids, so between night feedings and diaper change, and later if kids wake up in the middle of the night, there is quite a bit of movement at night. We considered this during our design.
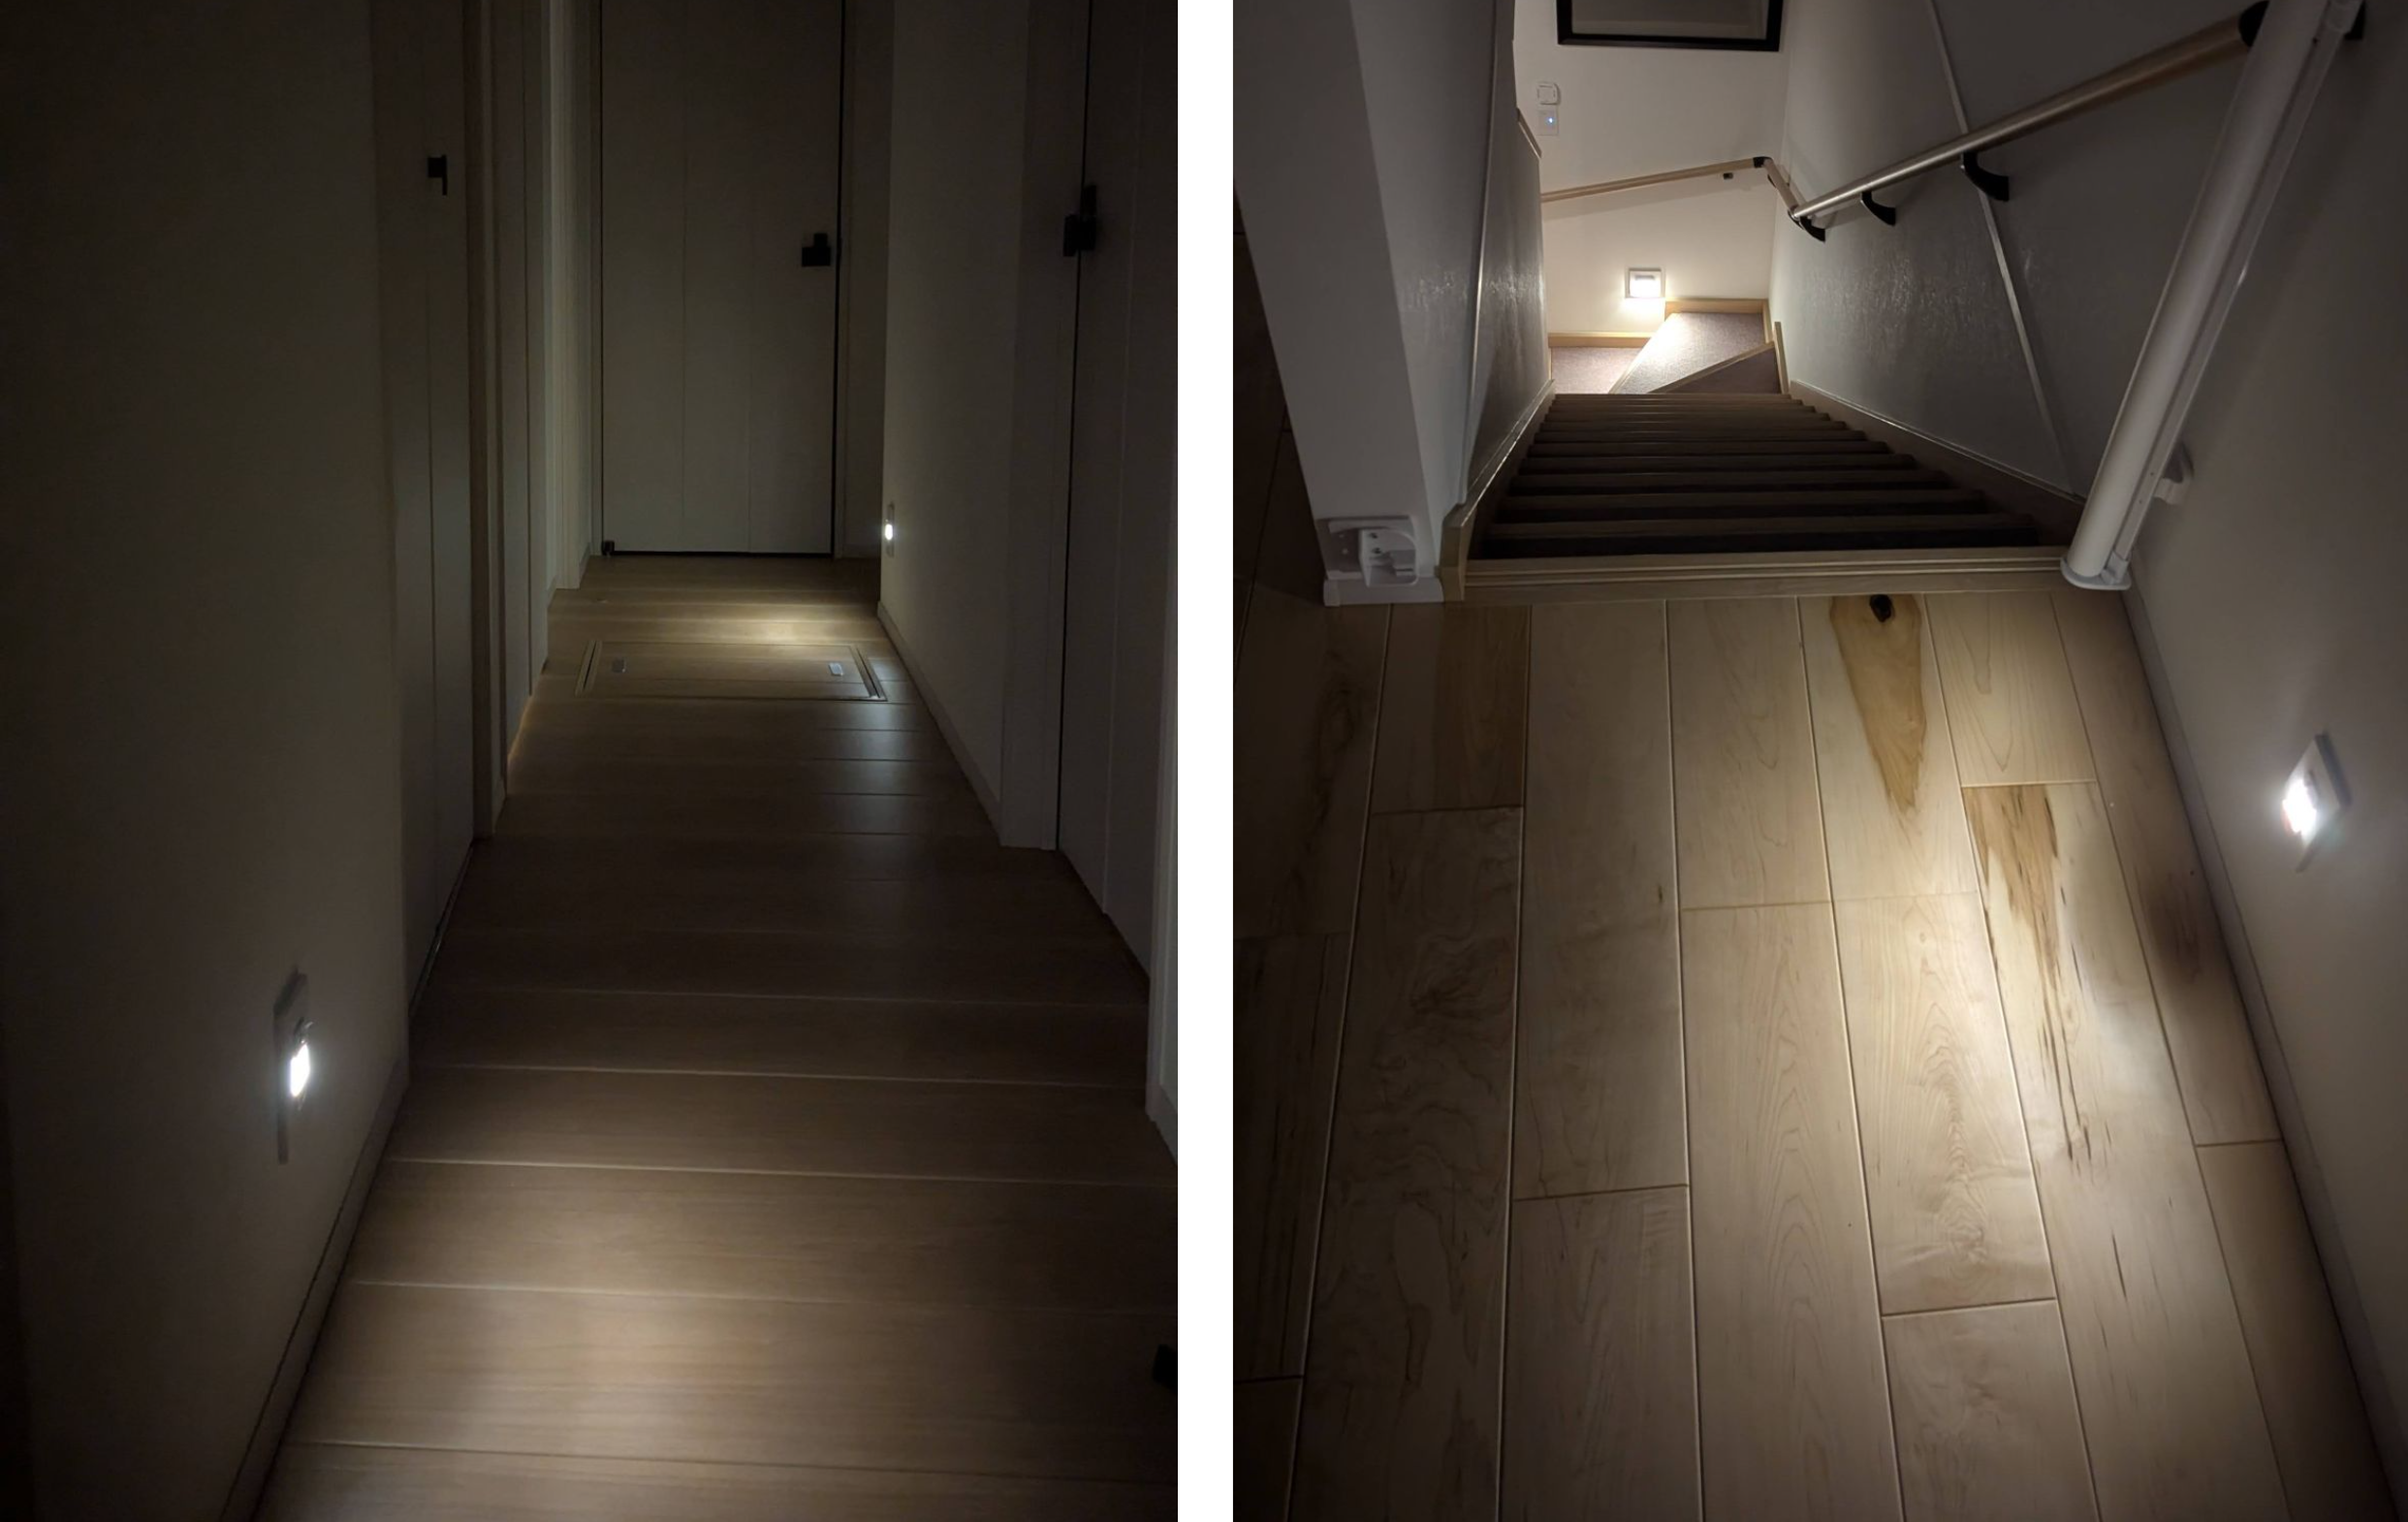
Night light at foot-level
These are small lights from Panasonic that come with either motion sensor or light sensor. We have the latter, so it turns on when it gets dark and stays on until the morning, giving the hallways enough like to walk safely. We also put one to the bottom and one to the top of the stairs: the advice here was that once you start walking on the stairs, it is easy to keep walking, so lighting up the two ends is enough. In practice those two actually make the entire stairs visible.
These really help not having to turn on the lights at night when going from one place to another.
Dimmable lights
We made most of the downlights dimmable. Right now this helps when I’m making formula for the baby or when changing diapers in the washroom, as we can keep the lights low to help us and the baby go back to sleep.
Auto-dimming toilet lights
For the toilets we added a motion sensor switch, so that the light gets turned on and off automatically. (We did consider using a smart switch and setting up the sensor ourselves, but one of the subsidies required the automatic switch.) We found one from Panasonic (WTK12749W) that supports ほんのり点灯モード which means that at night it turns on at a lower brightness:
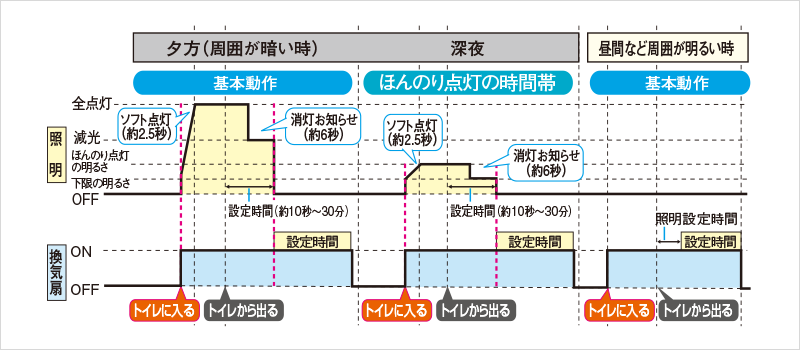
Moreover this also controls the ventilation fan which stays on a few additional minutes (exact time is configurable) even after the light turns off.
We didn’t add a window in either toilet, but if you have a window, then this can also be configured to only turn on the light if it’s dark.
Smart lights
I looked into smart lighting options in Japan, tested the Panasonic Advanced Series Link Plus switches, and got it for our house. So all switches (except the toilet and bath) are smart and can be controlled via HomeAssistant.
This is turning out to be more useful than expected: after moving in we realized that some light switches are hard to reach, e.g. the kitchen counter’s switch is only in the corner of the kitchen, so when leaving and turning off everything, it is a bit inconvenient. But since it’s smart, I could add a simple IKEA Zigbee button to create a secondary switch. Since the use-case is turning off all lights on the floor, I configured one of the buttons to do just that (off all lights).
Where HomeAssistant and the centralized smart home really shines is when new lights are added. For example the Christmas tree lights: I used a smart plug for these, which also integrated with HomeAssistant, so then I could configure the turn off all lights button to also turn off the Christmas tree lights. Similarly we needed an extra light at the diaper changing table, and I could sync it with the ceiling light, so you just press the normal switch and both lights turn on.
Switches and sockets
We added a bunch of electric sockets, and sofar they are proving to be very helpful, so I recommend adding as much as you can.
Light switches: I’d recommend considering where you would want to control the lights from, and adding multiple switches for the same light to ensure all places are covered. For example for the kitchen counter you might want a switch right next to it (I’m cooking and it got dark) and also at the entrance of the LDK (I’m arriving/leaving the room). Same for both ends of hallways and also the genkan (one next to the entrance door, one where you go from the genkan to the rest of the house). These are less vital if you get smart switches (as you can always add extra smart buttons later), but otherwise I would put some thoughts into it.
Per room overview
Here is the type of light we got for each room:
- bedroom: カチットF ceiling light
- kids rooms: カチットF ceiling lights
- office: カチットF ceiling light
- toilets: dimmable downlight with the auto-dimming sensor switch
- genkan: downlights
- hallways: dimmable downlights and the foot light
- storage under the stairs: bracket light with GX53 bulb
- stairs: bracket lights with GX53 bulb and the foot light
- LDK:
- living room: カチットF ceiling light
- dining: rail with a hanging lamp over the dining table. Also dimmable downlights
- kitchen: dimmable downlights and rail with two spot lights over the kitchen counter - this was a bit of an overkill, the downlights would have been enough, but we were thinking about getting some pendant lights for the counter initially
- washroom: dimmable downlight
- bathroom: downlights (this came built in with the unit bath)
