How to use the corporate babysitter vouchers (ベビーシッター派遣事業割引券)?
02 Aug 2024 | #japan | #parentingAll levels of the Japanese government have various programs to support people with kids. One of this, ベビーシッター派遣事業割引券, is a national program subsidizing baby sitters for working parents: companies can purchase baby sitter tickets and give it to their employees. My company is participating in this, and since it is a bit complicated to use, I’ll describe how to use it in this post.
1. Get the tickets from your company
My company uses a Google Form that employees can fill out and get 1-4 tickets assigned each week on Friday mornings. We have 2 weeks to use them, then they get revoked. Also we are only allowed to use them during working hours and not during weekends. Check your internal rules on how to apply and any additional conditions.
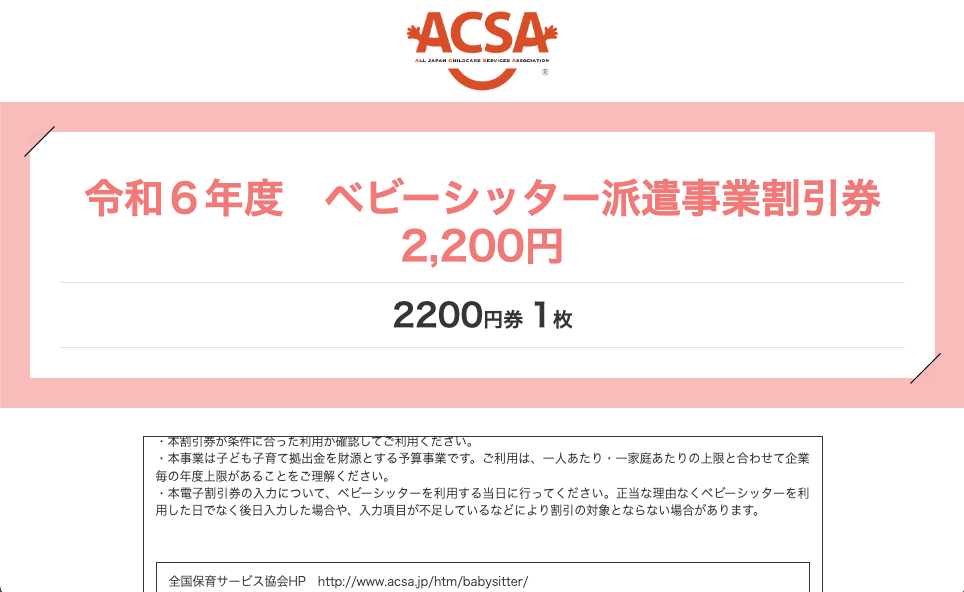
Once you get the tickets, you should receive a set of URLs like this: https://atms-bs.jp/eticket/e5fa44f2b31c1fb553b6021e7360d07d5d91ff5e that show a site like this:
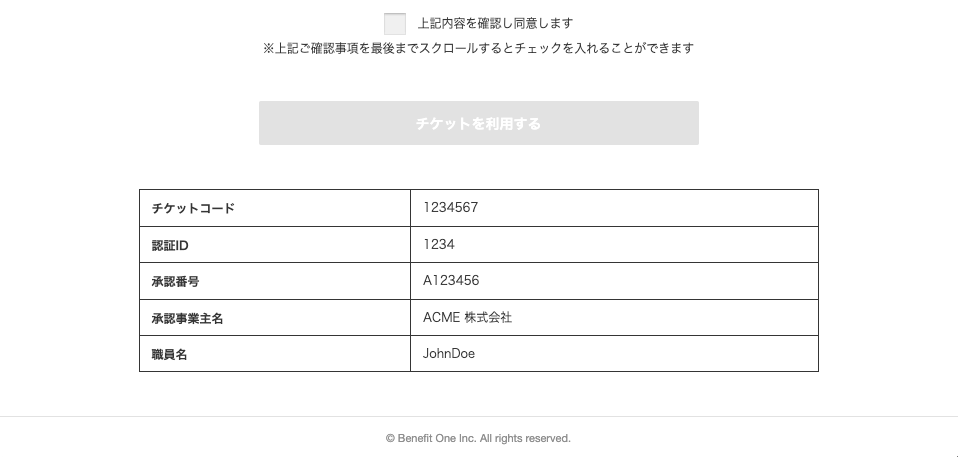
At the bottom of the page you can see the ticket code, the authentication code, the approval number, your employer’s name and your name:
2. Find a baby sitter site that accept these coupons
This involves a lot of Googling and/or asking your colleagues and HR for recommendations. We had success with (Poppins Sitter)[https://smartsitter.jp/], but since most of these websites just connect you with some local, freelancer baby sitters, the availability and quality of the sitters will vary greatly between locations.
Some other websites I’ve seen recommended:
Though I don’t have experience with these.
Make sure the site accepts these tickets (also sometimes the program is called こども家庭庁ベビーシッター券 and I believe it’s the same thing).
3. Find a baby sitter
This is the hardest part: look through the listings on the site and find someone that is available and looks good to you. Make sure the sitter accepts the tickets, as some could choose not to, even if the platform supports it. There should be a search condition for this.
You might want to message the baby sitter at this point if you have any question or to confirm the date, however do not schedule the time yet.
4. Register the tickets on the website
You need to register the baby sitter tickets by their ID on the reservation website, e.g. this is how to do it with Poppins Sitter. Even though some of the numbers will be the same between tickets, you still need to add each ticket one by one.
5. Schedule the baby sitter
Make the reservation on the website and select the previously registered tickets. With some sites (like Poppins Sitter) the discount is reflected immediately and you only pay the remaining price. I have seen some sites where they charge you the full price and later refund the value of the tickets.
6. Active the ticket
This is the step that we missed initially and the baby sitter platform ended up e-mailing us. Even though you already registered the ticket, you still need to manually activate each ticket. This can be done on the day of the sitting or afterwards.
- Open the URL that came with the ticket (the one like https://atms-bs.jp/eticket/e5fa44f2b31c1fb553b6021e7360d07d5d91ff5e)
- Tick the
上記内容を確認し同意しますcheckbox and click theチケットを利用するbutton -
If the babysitter has a QR code, you can scan it. Otherwise click the
QRコードが読み取れない場合はこちらlink, find the code of the platform (e.g.222R222for Poppins Sitter) and enter that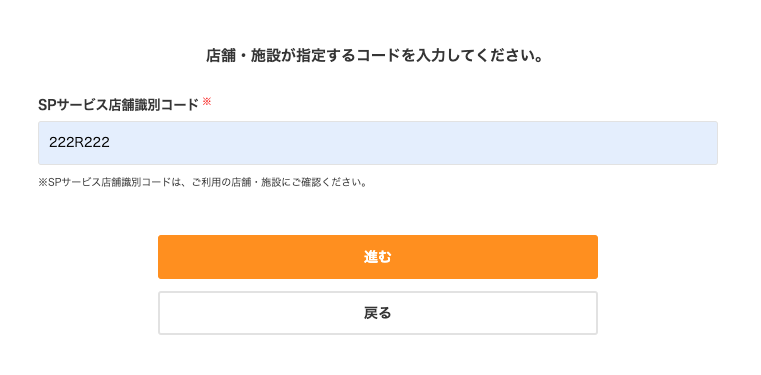
-
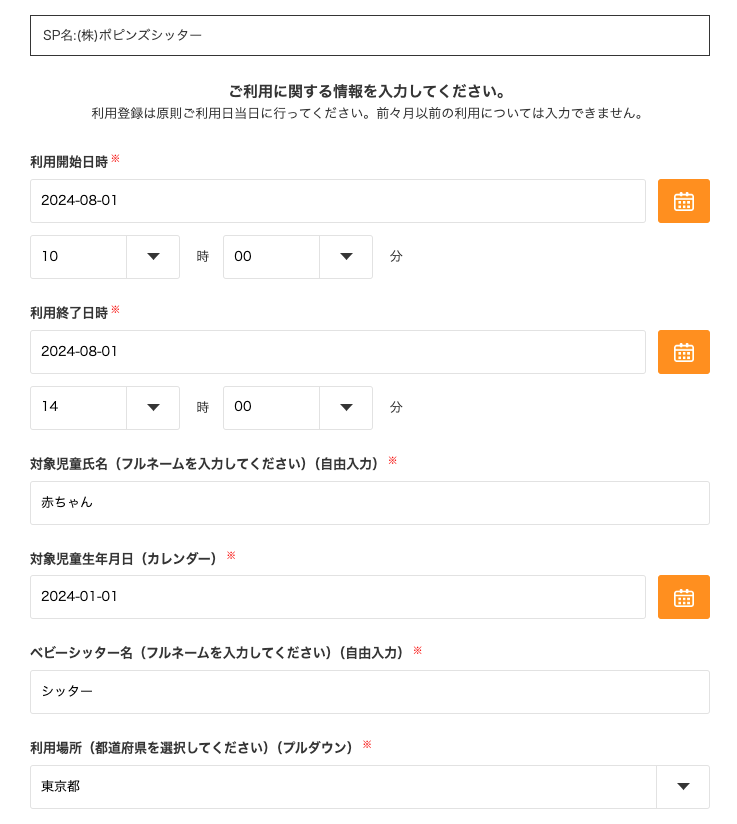
Confirm the name of the baby sitter company, input the time of the sitting, the name of the child, the birthday of the child, the baby sitter’s name and the prefecture of use:
- Accept the privacy policy and go to the next page
- Confirm what you just entered and click
利用する(確定)if everything looks good -
Done!
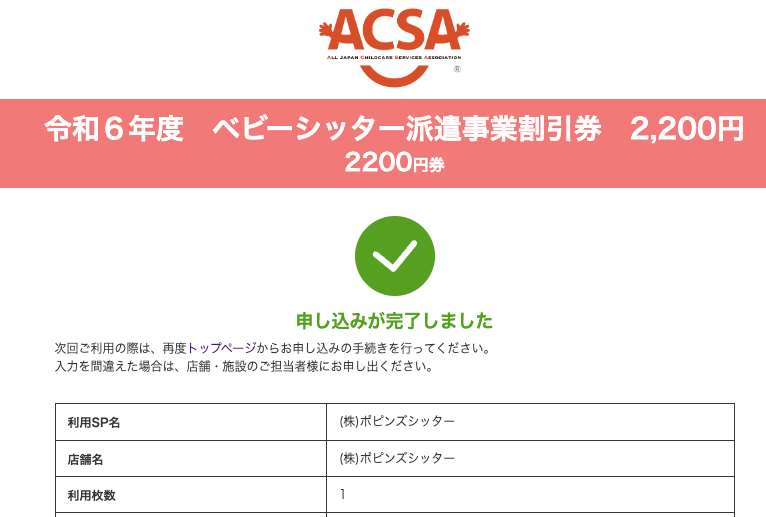
Repeat this for each tickets.
The site doesn’t remember any of the data (it would be nice to have at least the baby’s name and birthday pre-filled), but Chrome’s drop-down form fill help at least remembers the name of the sitter and the child.
